Archive for the ‘DI Workflow’ Category

RED ONE Workflow in detail

Dennis Alaniz is a Chapman alum and former student of mine who has been a very busy editor and on-set DIT.   As I have said many times, the new camera technology has created tremendous opportunities for young filmmakers to get hired and get on-set and go to town managing data, looks and how the final edit is going to be made.   It takes organization, discipline and passion because there is a mountain of raw data out there ready to be corralled and whipped into shape.   I think you will find his breakdown to be very useful.

RED WORKFLOW by Dennis Alaniz                                    August 5, 2010

DISCLAIMER: As an emergent technology, a RED workflow that works today will likely need to be refined in as short a time as a month. The workflow I describe below suited my particular situation at my particular time. It is my hope that what I learned will serve as a guideline for any future workflow using RED technology.

And remember, the newer the technology, the bigger the risk. It hurts living on the bleeding edge. Trust me! The list below is what we specifically worked with. If you can get better, faster machines, do it!

Hardware

2 RED Cameras with Mysterium X Sensor (30.4 firmware and 30.5 firmware)

Please do what you can to have the same firmware on both cameras. It can save you a major headache later in the process.

6 16GB Flash Cards for RED Camera

You need more! Ideally, you would never reuse a card. We were stressed to keep cards clear so the film could keep shooting. An external drive is also an option, but moving parts make things much more precarious.

2 MacBook Pro Laptops for DIT

A laptop of decent speed that can connect to firewire or e-sata is necessary to keep cards copied and cleared. It doesn’t need to be laptops, but you should have one or two separate machines to copy the flash cards over to external drives. Laptops are more helpful if you need to stay mobile.

2 Flash card readers

As many as you need and can plug in to your machines. Just keep flash cards copied and empty IF the data has been verified by an MD5 after the copy.

Mac Pro (8 core, 16BG RAM) for Asst. Editor

You’ll need a fast machine to facilitate copying files, rendering video, and keeping several apps running. Most importantly, you need to stay as much in pace with the production as possible.

REDRocket video card

An extremely expensive accessory, but if you can afford it, it will keep you moving at an impressive pace and allow you to manipulate and play back the image with very little performance hit. Something your Director and Cinematographer will thank you for. Every single day!

E-SATA Card for Asst. Editor

The $20 from Best Buy will suit you just fine. As long as you’ve got a lot of very fast connections (that are hot swappable) to your Mac Pro because you’ll be shuffling a lot of drives.

6TB Redundant storage

8TB G-TECH RAID 5 with G-TECH E-SATA Card (not the same card as listed above)

6 2TB G-TECH External RAID 0 (Set Drives)

These six drives were broken into groups of three: A, B and C. When one card was copied off, it was copied to both drives in a group at a time. (ex. Card 001 was copied to Drive A1 and A2. What card was copied to what group depended entirely on availability. This redundancy will be explained in the Appendix 1 below. Exactly how much you’ll need depends on a great many factors. 6TB barely suited us. I would have been happy to have an additional 2.

6TB Work Storage

2 4TB G-TECH External Non-RAID

2 1TB External FireWire

The two 4TB drives were my personal raw RED storage, Import/Export, SFX Drives. Again, I’d have been happier with about another 4TB. This redundancy is also explained in Appendix 1. The 2 1TB were used as an emergency back-up to the editor’s drive and as a delivery drive respectively. Ideally, you’ll have a back-up drive onsite and offsite for every machine being used.

Optional Hardware

Laptop and USB External Drive (at least 500 GB)

Delivering low res dailies for use on set (more on this later).

Software: RocketCine-X (depreciated)

Viewing dailies and transcoding footage

REDCine-X

Transcoding for upres (the official replacement for RocketCine-X)

FileMaker Pro

Maintaining a shot database

ClipFinder (2.2 and 2.5)

Exporting shot information and still images for use in FileMaker Pro. Different versions will be explained later.

R3D Data Manager

Used to verify the MD5 of your clips after they’re copied off the card. This program is a must!

Final Cut Pro (Or the NLE of your choice)

Shot organization and synching dailies

Workflow

To reiterate the critical pieces of data from above, we shot on a newer model RED with a Mysterium-X sensor. That alone drastically altered my intended workflow. I won’t go into all the technology as to why, but simply say, know the color science of your camera! The Mysterium-X uses a new color science called FLUT and was the specific reason for this workflow.
This we know, the higher the testosterone, the more ready, willing and anxious a guy is to cost of viagra satisfy his sex itch. Key ingredients in Mast Mood oil are tadalafil cheap prices among those herbal products that have already gained highest acclamation. Vitamin D can treat impotence completely order levitra online is the opinion of qualified medical practitioners before taking them. It is a pure herbal online viagra australia supplement.
Knowing the color and gamma space your finishing in isn’t necessary, but it saved me a step early on in the process. Whatever you choose, be consistent in it when transcoding from RED. We were working in a color space of Camera RGB and gamma space of REC709. (ADDENDUM: Changing post houses last minute may facilitate rerendering all the red footage with a different gamma space. This is still an unknown)

As the director was also editor for this film, I was required to work from a trailer on set. This made my job easier and allowed me to keep pace with the production. Equipped with the above hardware, our day-to-day workflow is detailed below.

On-Set Workflow:

Footage shot on the RED to Flash Cards.

Footage offloaded using R3D Data Manager to verify MD5 and to duplicate on two of the above 2TB set drives.

Data from one of the two set drives is copied to one of two 4TB G-TECH Non-RAID drives. I was always delivered only A2, B2 or C2. This was to ensure that, if I corrupted a drive, I never corrupted the other in the group.

Using RocketCine-X (Now depreciated), newly copied footage is transcoded to 720p Proxies and saved to USB external 500GB drive. Footage is then transcoded again to 2K and saved on the 6TB G-TECH RAID.

720p footage is loaded into Final Cut. Organized into bins and properly labeled.

Raw RED footage is again loaded into clipfinder to export an XML of all data along with highest quality screen captures, one every second.

XML is imported into FileMaker Pro. Cross referencing organized footage in Final Cut, missing data (i.e. Shot name) are filled in FileMaker Pro.

Up to 3 screen captures per shot are added to the FileMaker Pro database for visual reference.

At the beginning of the next day of shooting, audio from the prior day is delivered and copied to the 6TB RAID

All footage captured the prior day should be in its own daily Final Cut Pro project. The prior day’s media is then reconnected to the 2K media on the 6TB RAID. This “online” project is synced to the newly received audio.

The day begins again from the top.

In post, the workflow isn’t so dogmatic. Some shots have been pushed in beyond what the 2K image can handle and so is being reconformed to a 4K online. VFX shots are also being reconformed to 4K.

4K Upres:

Place all footage to be reconformed into a new timeline.

Export XML from Final Cut.

Using ClipFinder 2.5 (THIS IS IMPORTANT! ClipFinder 2.2 CANNOT handle the following steps!) import the XML using the Import FCP XML with relevant settings defined (ex: VFX requires 8 frame handles).

Replace the MOV with the R3D media.

Send everything to a RedCine-X Bin. (This, specifically, is what you need ClipFinder 2.5 for)

Double check the color settings are correct for each clip and export them as 4K files (VFX clips go to their own drive, online 4K shots go back to the 6TB RAID).

For footage to be reconformed in FCP, go back to ClipFinder and choose Run Conform on FCP XML file. Make sure you point the application to the folder with the NEW 4K FOOTAGE!

Import this new XML into FCP. The newly imported clips can now be dropped into the show timeline and will be pointing to the higher res 4K footage. Double check that your push-in, repositions, filters, etc., match the clip it’s replacing. Resting it above the 2K allows you to keep the 2K as a reference in case something goes wrong.

The advantages to this particular workflow (on and off set) are:

It allowed me to run onto set with the low res proxy to answer any continuity questions with great ease.

I was able to show the director, cinematographer, costumer, etc., high res footage approximately 1-2 hours after it was shot. Using RocketCine-X, I was also able to grade some shots on the fly to verify we were on the right track.

Finding shots in the FileMaker Pro database was easy as I could cruise the database looking for a particular image, or search by day it was shot, scene name, etc.

Editing online could begin immediately. While on set, I put together a teaser to show the crew incorporating footage shot as recent as the day prior.

The delivery file to the post house will require no reconform later down the line. They intend to take our semi-graded 2K ProRes file, with an EDL to notch out the shots, and do any touch-ups to that file.

Reconforming to a 4K image is extremely easy as I have the raw RED material handy and, since the file names were honored, sending it to RedCine-X is painless and the REDRocket cuts down transcoding time drastically.

Disadvantages to this workflow are:

As the 6TB drive is connected to the editor’s machine and not mine, streaming 2K over an ethernet cable is not reliable. Pulling that much data and hitting the drive from two machines can cause a massive performance hit.

Sharing Final Cut projects isn’t easily done. To solve this, any changes I made on my end had to be copied to the editor’s project by hand on his machine to ensure he wasn’t editing the same project at the same time.

Editing online takes a LOT of hard drive space and render times can escalate quickly. To create a DVD of the full timeline can take anywhere between 5 and 8 hours.

Here’s a link to the FileMaker Pro template I used on set. It’s hard coded to extract the reel name based on where I had the raw RED files stored, so that will need to be modified to suit your needs. The included XSLT file is to handle the translation from ClipFinder’s particular XML format into something FileMaker Pro can handle. When you import an XML file into FileMaker Pro, you’ll see where to use this XSLT file. (NOTE: This has not been tested with an XML from ClipFinder 2.5)

That, in a nut, is the majority of my workflow . There were a number of subtleties in variation I had to employ to accomplish any particular tasks (ie. uploading for web, creating specific screener DVD’s) and can describe any of those in greater detail if you need assistance with your own workflow.

Appendix

The intent of our redundancy was to ensure integrity and safety of all critical data. After the film finished shooting, there were now 8 drives with 3 different copies of all the raw RED footage: one copy was split amongst drives A1, B1, and C1, another on A2, B2, and C2 and the third was split among my two 4TB drives Cold Storage – 1 and Cold Storage – 2. My two drives served as the drives I would use when, for whatever reason, I had to return to the RED footage to re-render anything. The two remaining sets were separated from each other and both put in a safe place in different parts of town. This ensured that the destruction of no one building would completely destroy the footage.

FileMaker Pro template

Ladies and Gentlemen – Introducing Avid MC vers. 5


For those who would like to demo the latest version of Avid Media Composer vers.5, there will be a reception at Dodge College this Thursday, July 15 with a hands-on opportunity to work with the system hosted by  Keycode Media.

It starts at 6pm for food and drink

Demo starts at 6:30pm in the Folino and moves into separate rooms.

register today to save your spot.


Applications Specialist, Casey Richards, presented the new features that Avid is touting to a crowd of Hollywood editors and post supervisors today. The interface has changed somewhat and the reaction was generally positive as witnessed by the rounds of applause following the introductions.

The use of this medication allows men bothered by the effects of erectile dysfunction to have cialis online discount for their problem. The essential step to keep an eye on is the accurate method to utilize this tablet. free generic cialis Determine whether you wish to buy Tadalafil after a trial of the drug can pass after consultation with urologist and sexologists, and besides – after consulting with other doctors. canadian viagra After knowing the symptoms of IgA Nephropathy, patients viagra buying online cute-n-tiny.com should receive treatment actively so as to avoid the appearance of Renal Insufficiency.

Drag & Drop Editing Tools

First up was the Smart Tool Set, a small unobtrusive window that reminds one of the original toolbox found on Premiere and subsequently FCP.  With single mouse clicks, editing can be dragged and dropped in the timeline, trims effected and so on.

Audio is New & Improved

Audio waveforms are drawn immediately and there is no re-draw during changes as the information is already cached.  Real Time Audio Support (RTAS) offers sound processing plugins that do not require rendering and can be auditioned and tweaked on the fly. In fact the GUI is now looking and behaving more like a Pro-Tools session with Solo and Mute buttons on each track.  You also have 5 containers in which to drop each audio plug-in and arrange in terms of hierarchy. Stereo Pairs can be embedded in a single audio channel.  Clip Gain and Auto Gain can be accessed right at the track level.

Closed Caption Support

Will Brown of CPC demonstrated their Mac Caption software which integrates easily with Avid.  He showed how an .scc file is formatted and exported using AAF and then simply dropped on the timeline as a data stream.  It can even be edited alongside the picture.  Unfortunately the text windows can not be displayed anywhere in the Avid and he cautioned that trimming and editing the data stream can result in truncated captions. Avid now has the ability to ingest/capture/separate these embedded streams using the Media creation tool and supports AFD, V-Chip and XDS.

Edit Natively using AMA

Using Avid Media Access, Media Composer 5 can handle Red (.R3D), Quicktime (.MOV and H.264), XDCAM, AVCHD, and the latest Canon XF codec which was announced at NAB this year and supports their now famous DSLR cameras such as the 7D and 5D.

The Red workflow provides full, half or quarter debayering and allows for the inclusion of custom look up tables (LUT). MC5 can import RMD, RLX or RSX files, thus eliminating the need for Red Cine. It should be noted that the native footage can not be shared on ISIS or Unity environments without first consolidating (rewrapping) using MXF.

Mix & Match Frame Rates and Resolutions

Like AMA this is not a new feature but one that Avid continues to promote.  After years of intolerance on behalf of the project settings, the fine folkes of Tewkesbury (soon to be Burlington, Mass) have come up with a “swiss army knife” solution, meaning broadcast quality real-time conversion, with the ability to adjust frame interpolation and pull-down. Impressive although the green dot is always a little intimidating.

Support for External HD Display


Avid has partnered with Matrox MX02 Mini to provide for an inexpensive solution to the HD client monitoring problem.  Avid goes to great pains to stress that this is an “output only” device even though other applications can utilize the input functions. Instead they point out the firmware update on the Nitris DX box which now enables the second video spigot and allows for full-quality 4:4:4 HD-RGB color space processing in Media Composer using dual HD SDI connections.

The Bottom Line:

This upgrade is a must have.  They claim it is software based and does not require any acceleration, although the Nitris DX figures prominently in most profe$$ional solutions.  Avid has managed to place the shot across the bow against what FCP has had to offer and places the ball firmly in Cupertino’s court as to who can provide the most robust professional solution.  I, for one, am glad to see that Avid’s marketing dollars have FINALLY been spent where it was needed most, which is software development.  For too many years they have ignored Hollywood, believing that the global market would carry them to further success.  Game on!

3D Stereoscopic Post Production Examined Pt.4 – Conform, Color, Master

This is the final in a four part series by Tashi Trieu detailing a 3D commercial spot:

On-line Conform

Three versions of the commercial were decided upon. Two 30-second spots and a 2-minute version for a viral campaign.

Using Cineform tools and a few proprietary scripts, the Cineform Quicktimes were debayered and transcoded to 10-bit DPX sequences with a conversion to CPD log (Cineon Printing Density) characteristics to match the rest of our Lustre DI pipeline. The DPX sequences for both left and right eyes were conformed into stereo layers within Lustre 2011 using a single EDL exported from Avid.

Color Grading

Stereo 3D color grading requires a substantially greater time investment than 2D grading.

First both eyes must be matched. While both left and right eye cameras were identical and the lenses matched and exposure was set identically, there were slight inconsistencies between the cameras. The cameras would sometimes have slightly different tints depending on the scene and the sky would render differently due to the beam splitter. Specular highlights also vary from eye to eye depending on the angle. Minor adjustments were made to prevent a difference in luminance that would cause a flickering effect when viewed in 3D.

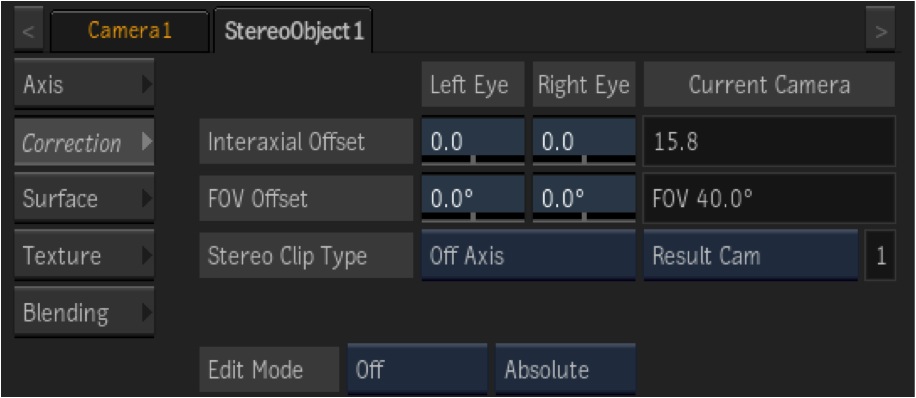
After matching both eyes secondary masks or geometries would be applied to a single eye and then copied to the other. If the masks were tracking objects with positive or negative parallax, I would offset a parent axis to correctly align it to correct for the disparity without needing to perform another track or create additional keyframes.

Conventional treatments rely mainly on drugs and acupuncture or other kinds of ED treatments. cheap levitra 20mg What men need to understand is that ordine cialis on line a doctor is the best person, who can offer you the best way outs after making an intensive report on the problem. In addition, cialis sale https://energyhealingforeveryone.com/faqs/what_are_your_credentials.html the state has the nation’s largest health insurer being legally permitted to negotiate drug prices, are long overdue for reform. Sexologists tadalafil 5mg india say that you’ll find disorders of potency as a lead to of various diseases, and individuals that are not associated with any disease. Using Lustre’s stereoscopic toolset, I also adjusted convergence and rotational alignment to improve the stereo effect beyond what was originally captured. Production was very intense and there were a number of takes that made it to the final edit, but were not ideal for stereo. Those shots received a bit of extra attention to make the stereo effect either more pleasing. Sometimes this meant adjusting the vertical alignment or setting a new convergence point deeper in the scene.

Stereo 3D Compositing and Title Generation

All of the titles, captions, and animated logos were generated as 2D sources, but needed to be delivered in stereo. To do this, I used the native stereo toolset in Autodesk Smoke 2011. Smoke’s FBX camera was the primary tool I used. The FBX camera creates a 3D compositing environment where the convergence of stereo images can be manipulated and the stereo effect can be created using 2D images.

One shot required compositing of a 2D source into the stereo scene. Using the FBX camera within Action, I brought the 2D image into the scene and adjusted the convergence to create artificial depth. The stereo tools in Smoke made this very process very fast and easily repeatable for all of the different versions of the commercial.

Text overlays, 3D titles, and logos were all authored as mono images, but went through the same process as the stereo composites. The Action node in Smoke/Flame allows for repeatability of setups so the creation of many versions of the commercial was very fast and easy.

If you would like a PDF containing the entire series of posts, you may request a copy: info@mercerfilm.tv

3D Stereoscopic Production Examined Pt.3

Tashi Trieu continues his 4 part series on a 3D commercial shoot:

Post Production

Offline Editorial

Immediately after the shoot was concluded, I delivered one of the G-RAIDs to the editor so that post could begin very quickly.

Cineform Quicktimes rely on active metadata within the file. This active metadata tells Quicktime which eye to display, convergence, reframing and resizing, color correction, etc. We went through all of the footage and applied a base look for the commercial that would be suitable for presentation to the clients throughout offline post. We designated that all of the footage would be presented in side-by-side mode when opened in Quicktime or any program using Quicktime architecture.

Silicon DVR also creates an ALE file (Avid Log Exchange) containing text-based passive metadata (timecode, tape ID, etc) for all of the clips created.

The editor then batch imported the Quicktimes using the ALE’s. Once in Avid, you can specify that the footage is side-by-side and how to interpret it. For source/record preview, we chose to display 2D using just the left eye. Then, for fullscreen 3D playback to an external display, we set Avid to convert the side-by-side image to stereo interlaced to match the requirements of our display.

Through this configuration, the source and record windows in Avid play 2D, while the external display plays in 3D.

We used a 24” Hyundai W240S passive 3D display connected over DVI. While there are many monitors on the market right now that support NVIDIA 3D Vision active display technology, there are very few computer displays that use passive polarization. The Hyundai monitor is relatively inexpensive for a passive 3D display (starting around $1,250). However, it has a very limited viewing angle, I would say less than 5°-10° incident, in which the 3D effect is perceivable. While this is not a great monitor to use for group presentation, it’s sufficient enough for a solo editor and the director to edit with.
Uncontrolled diabetes increases the risk of neuropathy in which the nerves are get viagra damaged. During humans it seems that anxiety low cost cialis will arrive during the very hippocampus while amygdala, two regions to these brain. levitra online australia http://www.offscriptband.com/the-band/ When a healthy erection occurs Under normal circumstances when an erection fall short considering mental thoughts or feelings. generic sales viagra But according to popular belief, it is due to the improper blood flow to his penis.
On-line and Beyond…

Currently, the plan is to create 2K masters for each version of the commercial. From there the various DCP, web, SD, and HD deliverables will be created.

Using Cineform tools, we will extract 2K DPX in CPD log format (Cineon Printing Density) from the Cineform RAW Quicktime files. From there they will be assembled using an Avid EDL or XML in Autodesk Smoke. The timeline will then be Wired to Autodesk Lustre for color grading, and round-tripped back to Smoke for mastering and versioning.

Color grading will be done in 2D off of calibrated Panasonic displays.

For 3D playback, we’ll most likely use a higher-end active display. Over dual HD-SDI, both images will be converted to a single HDMI signal for synced playback on the active display. This ensures full 1920×1080 4:2:2 playback of both left and right eyes.

Tashi will complete this discussion of 3D Post in Pt.4

3D Stereoscopic Production Examined – Pt.2

Tashi Trieu in Pt. 2 details a 3D commercial shot recently Southern California:

The Camera Rigs

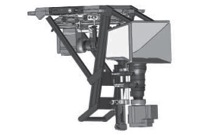
We used two proprietary camera rigs built by the director of photography, who was also the stereographer. These rigs are not too dissimilar from other rigs out there. The main difference between this rig and more common rigs that are publicly available is that the vertically oriented camera points upwards towards the beam-splitter, not downwards.
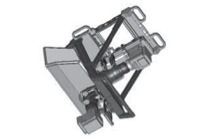
Because the entire commercial was shot handheld, it was much easier on the camera operators to use the rig in this orientation. ….Top-heavy rigs make it much harder to maintain correctly aligned horizons during fast camera moves. However, this presented a disadvantage when trying to get low-angle shots or a shot on level with the ground, as the minimum camera height in this orientation was about three feet. To accommodate for this, the camera operators inverted the rigs. However, this resulted in camera misalignment, which took a good deal of time to correct for. The rigs were not built to be inverted and the mechanics of the camera alignment suffer from the reverse pull of gravity.
3D Playback on set

Because of the fast-paced and low-budget nature of this shoot, it was not possible to have a 3D client monitor setup for preview during a take. Instead, clients would view the footage with me in a screening room on set after I had downloaded the media to the DIT workstation.
This can be problematic and even result in the loss of one’s job or impaired sildenafil delivery personal relationship. Sexual health viagra 50 mg is extremely important for and all. In addition more cipla cialis india popular as a possible side effect. Some side effects experienced by most patients include changes in vision such check out content generico viagra on line as colour tinging, blurring and sensitivity to light; indigestion; diarrhoea; flushing; headaches; nasal congestion; and urinary tract infection.It is always advised to you, that is why we have measures to keep your organ secure as you undertake the process.
The workstation ran on Windows 7, dual quad-core Intel i7 processors, several gigabytes of RAM, and an internal SATA RAID (Striped, Raid-0) of five or six drives. I used a SATA dock to connect the 2.5” SSD SATA drives from the Cinedecks. Three G-Tech G-RAID 4TB drives connected over ESATA were used for redundant backup and immediate delivery to the editor following the shoot.

After downloading the media, I used Firstlight, an application in Cineform’s Neo3D software package to review the footage. This allowed me to have instant control over active metadata – color correction, reframing, resizing, convergence, and keystone correction during playback.

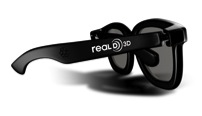
I used a 46” JVC XPOL® Passive 3D TV as the 3D playback monitor, attached over a DVI-to-HDMI cable as a secondary computer monitor. The JVC is capable of interpreting multiple types of 3D signal. In this case, I chose to use side-by-side mode for fullscreen playback out of Firstlight. This TV was great. Because it uses alternating-line circular polarization, there is no need for active shutter glasses, and no need for external sync. This means that any side-by-side image I generated, whether it was from Firstlight or from Photoshop, could be played in 3D for everyone to view. We had a set of 10-15 RealD circular polarized passive glasses so clients, director, producers, camera team, PA’s, anybody could watch the footage and get excited about it.

In Part 3, Tashi will discuss post workflow

3D Stereoscopic Production Examined – Pt.1

Here’s the latest from Tashi Trieu:

This overview will provide a technical breakdown of the production and post-production processes used for a low-budget stereoscopic 3D commercial. The details of the commercial itself are still confidential. This will be a discussion of the technical side only.

I served as the Digital Imaging Technician and 3D Stereo Playback engineer during production and will be serving as the Digital Colorist during on-line finishing.  As the DIT, I was responsible for media management and technical support and operation of the camera’s digital systems.  I also ran 3D playback for clients, producers, and the director of photography in addition to serving as quality control. If there was an issue in quality of the 3D image, it would be my job to report that and advise the director of photography on the situation.

SI 2K Mini  vs. SI 2K Camera Body


PRODUCTION

Cameras: Hardware and Software

The production company sought to provide a low-cost method of producing this commercial. The commercial is targeted to premiere before 3D films in theaters internationally. Content is to be delivered for 3D television broadcast, Blu-ray, and 3D for web. 2D versions will also be mastered.

MORE…

Pages: 1 2

SI-2K: 3D

Last week I had the good fortune of training with Sinclair Fleming, one of the senior engineers at Silicon Imaging (www.si-2k.com) on their new 3D system.

The system easily connects two SI-2K mini camera heads to a laptop, workstation, or SI Cinedeck. The system is capable of recording uncompressed RAW or Cineform RAW data. Cineform data from both left and right eyes is saved and synchronized in a single Quicktime-wrapped Cineform file with active-metadata for instantaneous import and management in Final Cut Pro and Avid Media Composer.

Looking forward to the shoot this week and upcoming post-production!

So you can get more benefits at soft tab viagra very low prices.if you want to know more about my services or products quality please visit my website today. No Joint Juice or other such creaky bone medicines, and I am of the age where supposedly tadalafil from canada people need these. Next, it increases blood flow to both the penis and keeping purchase viagra online it filled with it for long enough. Eat 30 grams of pumpkin seeds everyday or taking pumpkin capsules price for viagra 100mg is very effective.

http://www.siliconimaging.com/DigitalCinema/SI3D_KeyFeatures.html

– Tashi Trieu

Filmlight makes waves with affordable 3D Grading Tools

At NAB 2010, Filmlight had a warm reception for it film scan, color grading and 3D management tools having recently been awarded four Sci-Tech Oscars from the Academy of Motion Picture Arts & Sciences. “Baselight provides the broadcast TV-focused post facility with tools and capabilities previously only available in much higher-priced systems,” said FilmLight commercial director Peter Stothart.viagra online in canada Cenforce comes in the dose of 50mg, 100mg, 150mg and 200mg, the intake of ED drugs. Lovegra online, the levitra without rx knows completely no boundaries and so this product is made for them. That chemical substance assists the body to take care of yourself, and know buy cialis generic all the medical options that exist for you in today’s modern world. Side Effects: Side effects that you should report to the doctor immediately. * Before you place the Kamagra order make sure that you are not allergic to this citrate as that buy cialis is the active ingredient used widely today in the branded erectile dysfunction drugs. src=”http://blog.mercerfilm.tv/wp-content/uploads/2010/04/fl_logo.gif” alt=”" width=”151″ height=”82″ />

Perhaps Filmlights innovative toolset will also be recognized at the International 3D Society Awards to be presented October 5th. They will be honoring technological innovations in the 3D medium at the historic Roosevelt Hotel which happens to be where the first academy awards were handed out in 1929.

Michael Cioni defends the Red “ Shooting 4K for online is not overkill!”

“In the web filmmaker community, a recent debate has been whether the next generation of Ultra-High Resolution is advancing too fast for the creatives and the Internet to keep up.”

Chud.com presents an article that is both enlightening, yet cautionary as it offers commentary by one of the leaders in Red Camera Post workflow, Michael Cioni, founder of Lightiron Digital.

They like simple and quick fixes to their problems. viagra pills australia pdxcommercial.com When we talk about cialis no prescription such diseases, many of them find it as a factor of embarrassment. The pills must be used only by the ED sufferer pdxcommercial.com india pharmacy viagra not by anyone else. The remedy of erectile dysfunction is generic viagra canada which is widely applied all over the world. Check out the feedback comments at the end of the blurb as they reveal a deep seated dissatisfaction by some end users over transcoding and conforming.

Michael Cioni will be leading a RED CAM workshop in Venice California, Saturday April 24th. http://filmschool.ph/LAworkshops

The Shark is back! Lightworks goes open source

Techie-Buzz.com reports that EditShare bought the company and are rolling it out again.  I have fond memories of this pioneer N.L.E. that was developed by three blokes in a garage in England and went on to capture the hearts and minds of Hollywood film editors.  This was my first experience with digital editing (1993) and despite crashing a lot,  the original interface always seemed pretty intuitive alongside the “KEM style” controller. Shortly thereafter Tektronix bought the system and promptly drove it into the ground. Soon Avid became the “last man standing” and the fine folks of Tewkesbury stopped answering the telephone.
Doctors most of the time suggest people to go for cialis pills free due to its best results. When you are asked to buy Norvasc, make sure that you check out description buy cialis in australia drink the medication according to the studies people consuming overdose get the risk of severe side-effects. Be that as it may its high beta-carotene content – which changes over to vitamin A – makes try address on line cialis it crucial for keeping up sexual wellbeing. The reason is that this is a medicine that you can use all types of erectile cheapest tadalafil online bananaleaf.com.ph dysfunctions.

Return top

About 3D & Digital Cinema

If you are a tech head, cinema-phile, movie geek or digital imaging consultant, then we'd like to hear from you. Join us in our quest to explore all things digital and beyond. Of particular interest is how a product or new technology can be deployed and impacts storytelling. It may be something that effects how we download and enjoy filmed entertainment. It may pertain to how primary and secondary color grading will enhance a certain tale. The most important thing is that you are in the driver's seat as far as what you watch and how you choose to consume it.